May 15, 2011
The Flicker
This was a thesis project in university animated in what has become my favorite style to work with.
April 3, 2011
Goomba coaster
I'm waiting on a silicone order right now so I figured I'd use up the rest of my sculpey making more stuff. Once I have the silicone I'll cast them all at the same time.


March 27, 2011
Trainyard
This was one of my first attempts at animation. I was still learning Aura and getting a feel for the software's features.
Big thanks to Jaymez for the awesome music.
Big thanks to Jaymez for the awesome music.
March 21, 2011

March 17, 2011
Now in color!
Here's the final paint job. It took a while because I wasn't sure which colors I wanted to use but any future reproductions will go significantly quicker.


March 7, 2011
An oldy
Just found this on my old hard drive. It's an animation I did for my drawing major. I never could think of a title for it and eventually gave up after a couple years.
Thanks to Brett McCoy for doing the music on very short notice before a screening a few years back.
Thanks to Brett McCoy for doing the music on very short notice before a screening a few years back.
February 24, 2011
cleanup
I dremeled and filed down the flashing around the edges. I also fixed that crater in the pipe wrench by pressing it back into the mold with some fresh resin.

 I'm still having a little trouble leveling the feet. It looks like they may have been angled slightly in the casting process. It'll take some time but I should be able to sand them until they're level.

February 23, 2011
Better then expected resin cast
Okay, here it is. I'm not too sure about the thickness yet so I may end up drilling a hole in the bottom and adding more resin just to make sure it's durable.
 You can see there is a lot of flashing around the edges but that was expected. There were some silicone bubbles between the legs that led to excess resin that will need to be filed down.
 The biggest problem was a resin bubble that formed in the pipe wrench during the casting. It's hard to see in the picture below but there's actually a large crater in the side of the wrench making it almost hollow. I had a similar problem with part of the Rageguy cast and I filled it in okay so hopefully it won't be too big a problem.
 Once I get it all cleaned up I'll find out whether or not the baby powder in the mold actually made it paintable.


February 21, 2011
Casting
I decided to scrap the inferior half of the mold shell which was too far gone to use. I set the silicone into the face half and drizzled plaster over the back to hold it in place. The plaster all the way around also lets me hold it while rotocasting without compromising the shape of the silicone.
Since most of my keys didn't survive the original separation, I decided to keep the back shell pretty thin and I'll just break it off when I'm ready to demold. The rubber bands are just there for added support.

 The first batch of resin mostly leaked out through the seams. It was expected so I mixed a small batch. The first batch also sealed the seams as it cured so I shouldn't have to worry about any more leaking, I'll just have a lot of cleanup to do on the finished product.
Since most of my keys didn't survive the original separation, I decided to keep the back shell pretty thin and I'll just break it off when I'm ready to demold. The rubber bands are just there for added support.

February 17, 2011
FTFY
Okay, this turned out to be a better solution. Just cut up some paperclips and poked them through the wall.
 Last step will be too patch up a few holes with some more silicone. It's a big mistake I made several times while separating the two halves of the mold.
 Once all the holes are sealed I can revisit the shell issue. Unfortunately I'll have to deal with seams sticking out on the finished product but I should be able to sand or file them down.


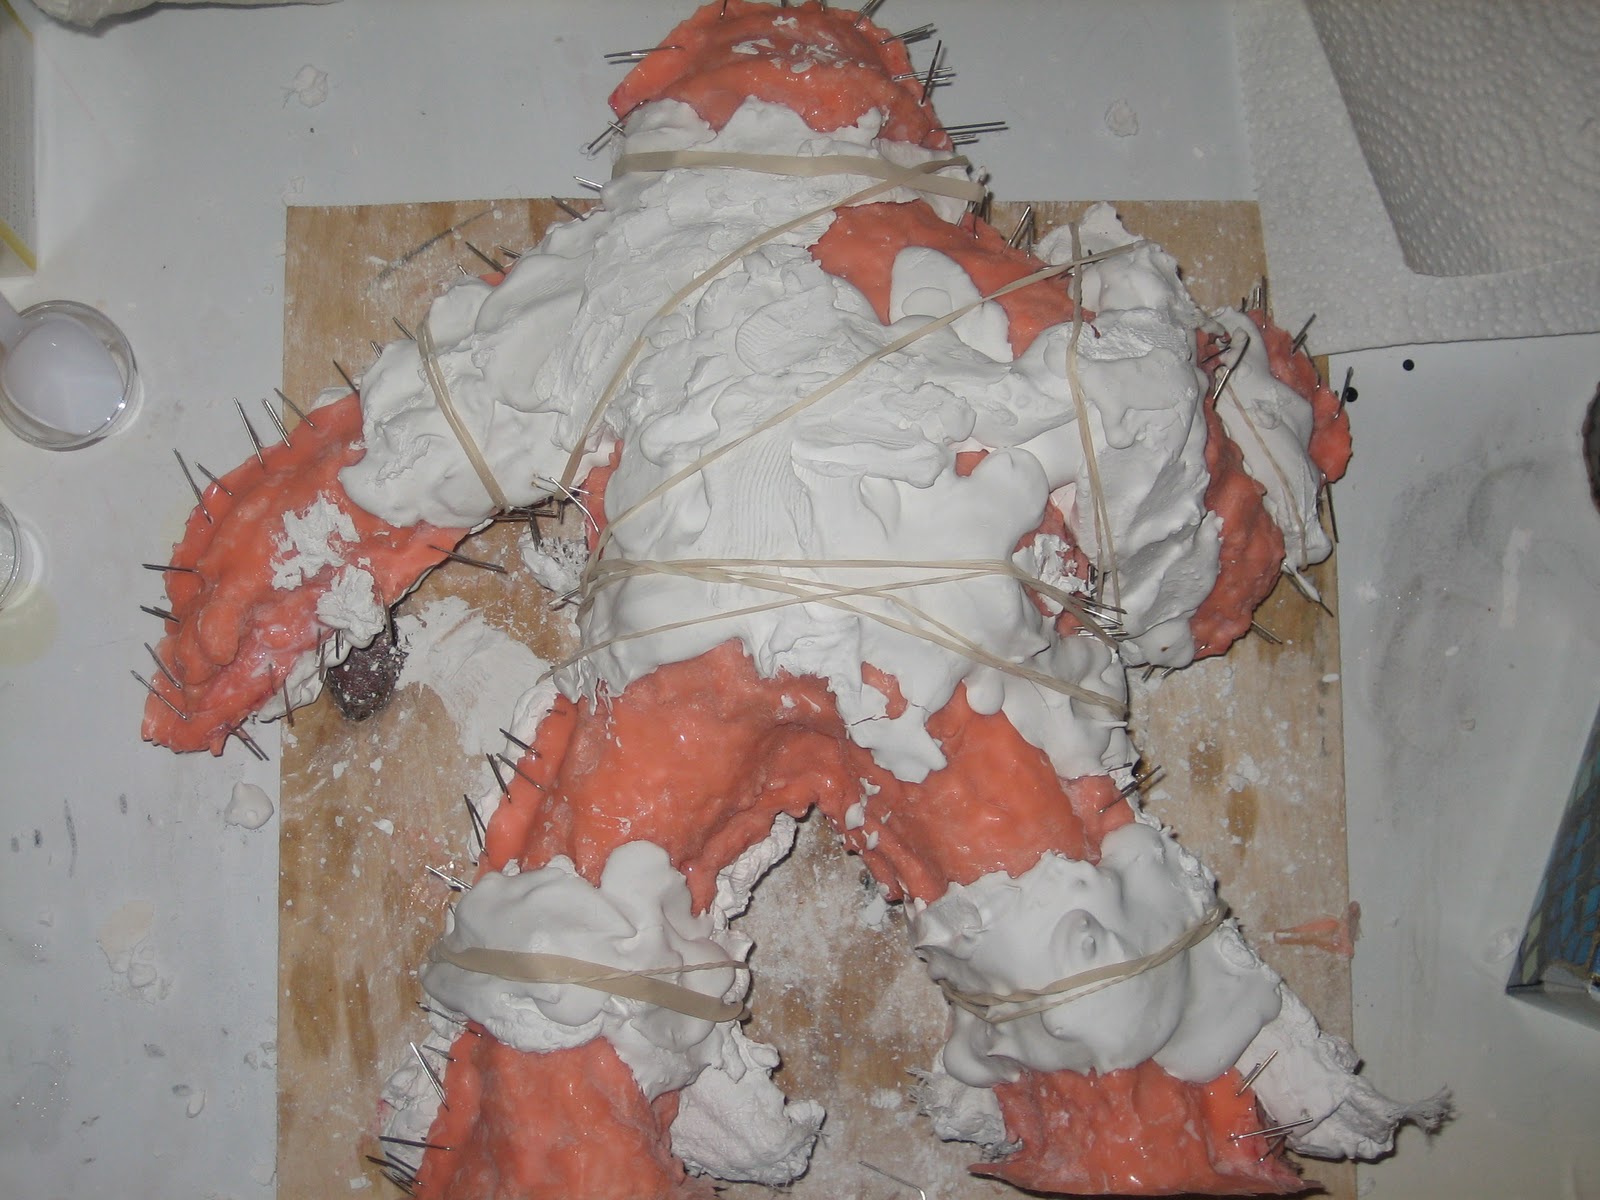
February 16, 2011
Okay...
So The silicone still ended up being thinner then I would have liked but it holds up okay. I created a plaster shell over it and decided it would be helpful to lock the silicone into the shell for support. Unfortunately I didn't count on the fact that I'd have to do some deep cutting to separate the two halves of the silicone.
 I ended up having to break off the plaster shell which fortunately remained in one piece (more or less) since I had reinforced it with cheese cloth. It's still in very rough shape however so it's future as a mold shell is still a question.
 These are the ruins of the original sculpt. As I peeled back the silicone, the top layer of Sculpey was already flaking off. Since the future of the statue is uncertain I'm back to wondering whether or not I should have baked the sculpt. If I had, I would be able to try the silicone and plaster over again. Then I look at my container full of Sculpey scraps and realize how much materials I saved to use over again.
 Now the issue is re-closing the silicone. There are keys in the wall but they serve little purpose and I can't rely on the plaster to hold everything in place. I'm toying with different options to keep it closed.
 I don't have enough surgical clamps to close the whole thing and tape won't stick to silicone so I might be stuck with paperclips.
I also coated the interior of the mold with baby powder. Theoretically this will help make the resin cast paintable but it remains to be seen. If it doesn't work, I'll have to find an autobody primer.


I also coated the interior of the mold with baby powder. Theoretically this will help make the resin cast paintable but it remains to be seen. If it doesn't work, I'll have to find an autobody primer.
February 2, 2011
Silicone
Here's my progress on the silicone so far and I way underestimated how much I would need. You can see where it's still very thin (almost everywhere) and there's still a lot of grey showing through. I've started building up the mold walls and I'll start adding keys soon.

 I'll probably build up keys on the front and back as well to secure into the plaster shell. I won't have enough silicone to get it as thick as I'd like so I'll be relying on the shell for added support.


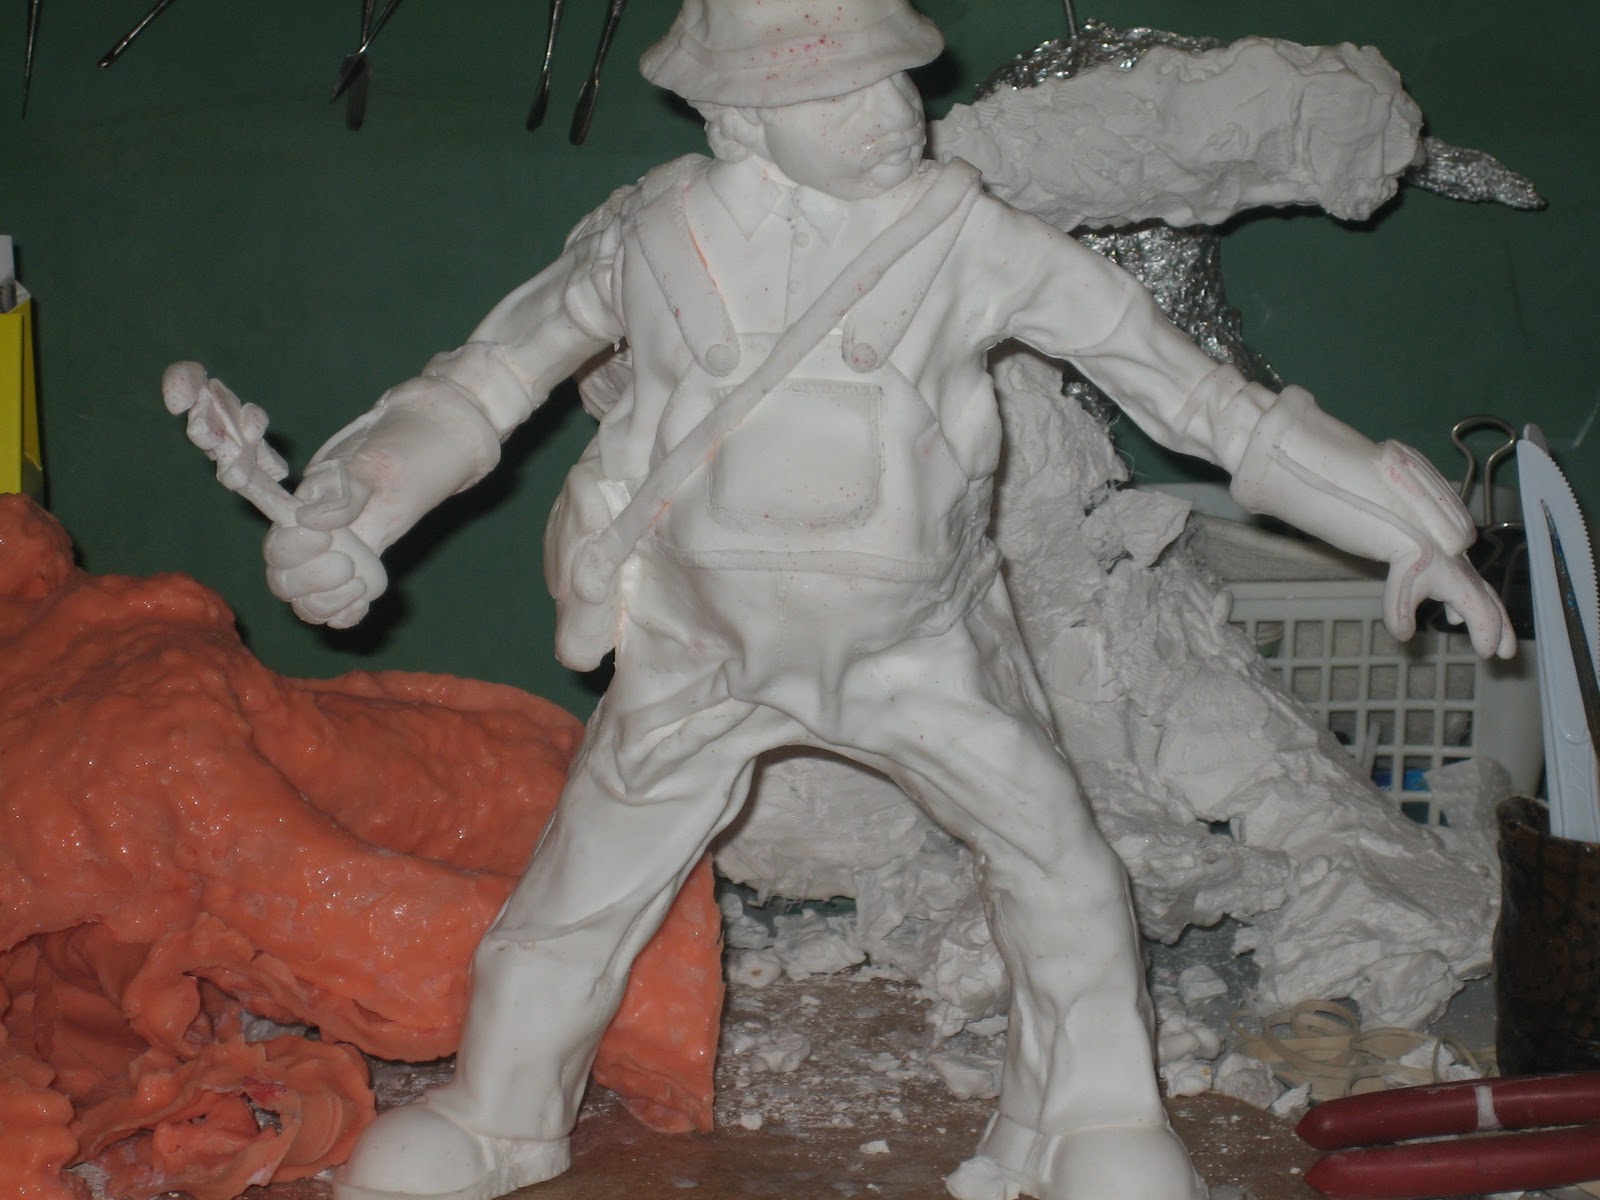
January 19, 2011
Almost done
Okay, here it is. I still have some clean-up and detailing to do but it's otherwise finished.
 I'm debating whether or not I should bake it before I start applying the silicone.
Pro: In case anything goes wrong in the casting process, the sculpt will survive and I can cast it over again if necessary.
Con: I'd be losing a lot of sculpey.
Anyways, I'll hopefully be starting the silicone tomorrow so I'll have to make a decision by then.

Pro: In case anything goes wrong in the casting process, the sculpt will survive and I can cast it over again if necessary.
Con: I'd be losing a lot of sculpey.
Anyways, I'll hopefully be starting the silicone tomorrow so I'll have to make a decision by then.
January 16, 2011
New sculpt
I've been working on this for about a week now. You can see a larger abandoned project in the background; you'll find I have a bad habit of doing that.

It's my first time using Sculpey Firm and I'm impressed so far but I mixed it with some Sculpey III to make it a little more manageable. I still have a lot of work to do but hopefully I'll be posting some pics of the finished piece in a few days.

It's my first time using Sculpey Firm and I'm impressed so far but I mixed it with some Sculpey III to make it a little more manageable. I still have a lot of work to do but hopefully I'll be posting some pics of the finished piece in a few days.
January 15, 2011
Moderate success
I decided to test out two new materials to give my sculpts some permanence: Smooth-cast 305 and Rebound 25. Choosing some relatively easy subjects, the process went as well as could be expected for a first attempt. Both casts survived the demolding and look good on a desk.


"Rageguy" turned out okay except for some weak spots that broke early on. I fixed them by adding on some half-cured smooth-cast and sculpted it until it set. I was surprised by how well it took the enamel paint.

 I was a little cocky going into the process with "trollface" and it came back to bite me. I didn't properly monitor the curing of the silicone and ended up with a lot of bubbles. The bubbles were an easy fix but my lack of patients in the actual casting left me with a few weak spots in the final product. I'll see what I can do to fix it up a bit.
I think I'll throw them up on ebay to make some materials costs back. The molds are still in great shape so I can reproduce them if I want one of my own.


"Rageguy" turned out okay except for some weak spots that broke early on. I fixed them by adding on some half-cured smooth-cast and sculpted it until it set. I was surprised by how well it took the enamel paint.


I think I'll throw them up on ebay to make some materials costs back. The molds are still in great shape so I can reproduce them if I want one of my own.
Subscribe to:
Posts (Atom)